I made a delicious batch of dairy free and gluten free cookies the other week. They used pumpkin puree to make a lovely chewy cookie, but with very little fat and refined sugar (it used pureed dates and some maple syrup). No photos because they all got gobbled up (but the recipe is here if you're interested).
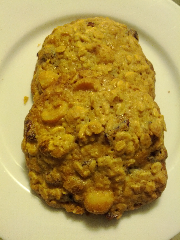
They were so easy to make, I had to make some more! These are oatmeal cookies with cranberries and macadamias. My little boy loves them, and I feel a lot less guilty letting him munch on one of these than I do when he stuffs a packet of little teddies in his mouth (especially since he is going through a very picky stage and won't eat much of anything). The best thing is you can start with the basic oatmeal mixture and add whatever extra goodies you like, such as chocolate chips, nuts, seeds or any dried fruit. They keep for at least a week in an airtight container, or you can freeze them for later. I think the next batch will be apricot and almond.
Basic Oatmeal Cookies (Dairy Free)
Dry Ingredients
2 cups rolled oats
1 cup plain flour
1 cup loosely packed brown sugar
1 tsp baking powder
½ tsp salt
½ tsp cinnamon
1 cup of yummy bits (coconut, dried fruit, chopped nuts, choc chips or seeds, or any combination)
Wet Ingredients
2 eggs, beaten
¼ cup maple syrup
60ml light vegetable oil
½ tsp vanilla extract
Preheat the oven to 180∘C, and like a baking tray with non-stick baking paper.
In a large bowl, mix together all the dry ingredients. Mix well to break up any lumps of brown sugar. In a separate bowl, mix the wet ingredients, then add to the dry mix. Stir until just combined. Drop tablespoonfuls of the mixture onto the baking tray. Allow space between for the cookies to spread. Bake for 15-20minutes or until golden brown. Allow to cool on a rack. Makes approximately 16 large cookies.
Showing posts with label dairy free. Show all posts
Friday, 13 July 2012
Wednesday, 29 February 2012
Muesli Bars
Another addition to my attempts at making some kid-friendly (and mum-friendly) snacks. Muesli bars can have a lot of fat and refined sugar in them (even home made versions), so making your own gives you more control over the ingredients, and also the portion size. I'm aiming for a much softer and smoother texture than you would normally expect, suitable for a little tot who can't chew whole oats. This is the first time I've used chia seeds in a recipe!
I'm using a brownie tray (17cm x 27cm) to make these.
Muesli Bars (makes approx 16 small bars)
½ cup wholemeal plain flour
½ cup ground oats (I put oats in the coffee grinder to make a fine meal)
¼ cup white chia seed
¼ cup ground almond meal
¼ cup dessicated coconut
½ cup each of dried apricots, dates and apples
1 egg, beaten
¼ cup virgin coconut oil
¼ cup apple juice concentrate
Preheat oven to 170˚C, and line a baking tray with baking paper.
Place the dried fruit in the food processor and process until finely chopped. Add the fruit mix to the dry ingredients and mix. Add the egg, coconut oil and apple juice concentrate and mix. Press the mixture into the baking tray and smooth the top.
Bake for 15-20 minutes or until golden on top. Cut into small squares or bars. Store in an airtight container.
Monday, 30 January 2012
January Challenge: The last day
Every year around Australia Day, my little family joins up with some other families and we go on a long weekend holiday with the kids. When we first went, it was three couples with one child and one baby on the way. Five years later, it's 4 couples with 8 children and one baby on the way! To say that it's hectic is an understatement, but everyone has fun, so we keep going back.
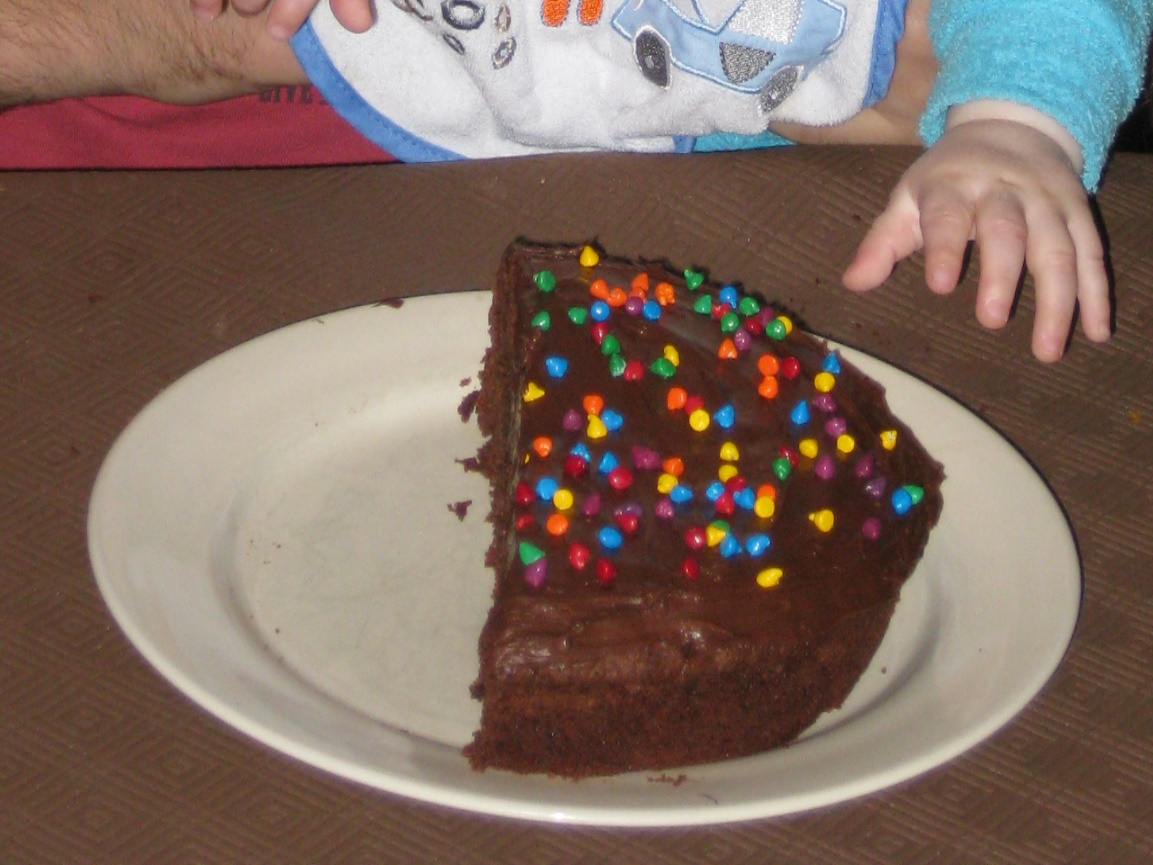
This year, we celebrated my little boy turning 1 with a party. I made a very special cake - it's a dairy free chocolate cake (one of the party guests has a casein allergy). If you're a bit of a nerd, you'll recognise it straight away. If you're not a nerd, then you might be interested to know that it's a reproduction of the cake from the video game Portal.
![]() |
| This was a triumph. |
I spent some time looking at different recipes. I don't make a lot of chocolate cakes, so I don't have a foolproof recipe. I wanted something that wasn't as heavy as a mudcake, but richer than a cake made only with cocoa. I also had the challenge of cooking at a holiday house, so I wanted a recipe that could be made without a great deal of effort. I found just the thing I was looking for at CitrusAndCandy. I'm going to show my version of it here, because I had to modify it to make it dairy free, and because I didn't quite have all the ingredients when I got to the holiday house! The cake was very moist, but not fudgy. It holds it shape when cut, so it's a good cake for shaping. It doesn't rise a great deal, so I made two and sandwiched them together to get the height I was after.
![]() | |
| The cracks didn't matter once the cake was levelled | . |
Dairy Free Chocolate Cake
All cup measurements are 'loosely packed'
1 cup dairy free margarine (eg, Nuttelex)
1 cup sugar (I used half brown sugar and half icing sugar!)
1/2 cup cocoa
100g dairy free chocolate
160ml chocolate flavoured soy milk
1 tsp vanilla essence
1 tsp coffee essence
1 1/3 cups plain flour
2 tsp baking powder
3 eggs
In a heat proof bowl, place the margarine, sugar, cocoa, chocolate, essence and soy milk. Heat over a pot of simmering water until all the ingredients are melted and well mixed (you could also do this in the microwave 30s at a time, stirring in between).
Remove from the heat and allow to cool for a couple of minutes, then add the eggs, whisking well between adding each egg. The mixture will start to look glossy. Mix the flour and baking powder together. Add the flour 1/3 of a cup at a time, whisking well, after each addition.
Pour into a greased cake tin, lined with baking paper, and bake for 40 minutes at 170degC.
Allow to cool in the tin for at least 15 minutes before turning it out.
To decorate, I used a dairy free chocolate spread as frosting (Sweet William brand "Scooby Doo Chocolate Mud"). I only needed one jar for the entire cake. Then I covered with chocolate flavoured sprinkles, and piped on white frosting.
The cherries are maraschino cherries. I left the stems on.
Plain Dairy Free Frosting
(makes about 2/3 of a cup, suitable for decorating)
2 tsp dairy free margarine
1 tsp soy milk
1 cup pure icing sugar
Whip the margarine and soy milk until smooth and light, and gradually add icing sugar, continuing to mix until the mixture is the stiffness you require. Allow to rest in the fridge until you are ready, then transfer to a piping bag and nozzle.
![]() |
| Success! |
The pantry challenge is now over - I've certainly been able to clean out a lot of things from the freezer and pantry. It's also made me more aware of what's in there. Thanks to those who joined in the challenge with me, I'll definitely be doing it again next year.
Friday, 6 January 2012
January Challenge: Day 2
In between watching some excellent Test Cricket and gardening, I made a tasty fruit slice using some ripe banana that I was storing in the freezer, some dried fruit and nuts. This slice is based on a great recipe at Taste.com.au, but I've modified it a little for the ingredients I had available - namely a pack of organic prunes that was sitting at the back of the fridge. Peeled ripe banana freezes well, but is only good for mashing once defrosted.
Banana Slice
- 150g (1 cup) chopped prunes
- 3/4 cup (packed) brown sugar
- 250ml (1 cup) water
- 320g (2 cups) plain flour
- 1 tbsp baking powder
- 260g (1 cup) mashed ripe banana
- 55g (1/2 cup) chopped walnut halves
- 1/2 tsp bicarbonate of soda
- 1/2 tsp cinnamon
- Preheat oven to 180°C. Line a brownie pan with baking paper, and lightly spray with cooking oil.
- Combine prunes, sugar and water in a saucepan over low heat. Cook, stirring, for 2 minutes or until sugar dissolves. Increase heat to medium and bring to the boil. Remove from heat.
- Place flour, baking powder, walnuts, cinnamon, and bicarbonate of soda into a large bowl. Add the sugar mixture and mashed banana. Stir until just combined. Spoon into prepared pan and smooth surface with the back of the spoon. Bake in pre-heated oven for 30 minutes or until a skewer inserted into the centre comes out clean. Remove from oven and set aside for 5 minutes to cool before turning onto a wire rack. Serve warm or at room temperature.
- This cake is dairy and egg free.
For dinner, I made a lamb and spinach curry using curry paste from the fridge, spinach from the freezer and tinned tomatoes. I also threw out a packet of baby snacks that had gone stale.
Friday, 2 September 2011
Winter Citrus
This year I've really discovered what it means to be eating seasonally. And not surprisingly, it's a little frustrating. At this time of year the winter fruits and vegetables are past their prime, you're sick of eating root vegetables, and the spring greens haven't arrived yet. I can't wait for summer!
Citrus are still good this late in winter, and the home grown stuff is everywhere. Last weekend I saw a family with a lemonade stall out the front of their house, selling fresh home made lemonade to people walking home from the beach. I have oranges, lemons and grapefruit in my fruit bowl, so this week is all about cooking with citrus!
Grapefruit and Poppyseed Cake
My first attempt was some grapefruit and poppy seed muffins. I was making up the recipe as I went, and skimped a bit on the sugar. The result was light and fluffy, but absolutely tasteless, muffins. Oops! Back to a recipe that works (adapted from this one by Joy The Baker). I made two mini-cakes with this mixture. By using the whole fruit, including the pith, you get a very intense flavour, just don't skimp on the sugar!
½ grapefruit + 2 tbsp water
3 eggs
1 cup caster sugar
100ml macadamia oil
1 tsp vanilla
1½ cups plain flour
1 tbsp poppy seeds
2½ tsp baking powder
Cook the grapefruit and water in a covered microwave-safe dish for 5 minutes on HIGH. Allow to cool. Remove the stem and any seeds and blend the grapefruit and cooking liquid until it is a smooth purèe.
In a large bowl beat eggs and gradually add sugar until light and foamy. Keep beating and add oil and vanilla in a thin stream. Add grapefruit puree and mix well. Finally, fold in the flour, baking powder and poppy seeds.
Bake in a greased tin for approx 50 minutes at 170℃, or until a skewer comes out clean. This method works well for other citrus too - try it with oranges, lemons or tangelos (you need about ½ cup of pulp).
Saturday, 6 August 2011
Chocolate Hazelnut Cake
| Don't worry, he didn't actually eat any! |
I think a much better use for it is as a topping for cake.
Happy Half Birthday!
Chocolate Hazelnut Cake
3 eggs
1 cup sugar
1 tsp vanilla
1 tsp vanilla
100ml macadamia oil (or other light vegetable oil)
1 cup plain flour (or any wholemeal plain flour)
1/2 cup hazelnut meal
1/4 cup sifted cocoa
1 tsp cinnamon
1 tsp cinnamon
1 tbsp baking powder
1 grated apple
Grease and line a cake tin, and preheat the oven to 180℃.
Beat the eggs and sugar together until pale and foamy, when the sugar has dissolved. Add the oil, apple and vanilla and mix well. In a separate bowl, mix the dry ingredients, then gradually fold into the wet mixture. Pour the mixture into the tin and bake for approximately 40 minutes, or until an inserted skewer comes out clean. Allow to cool in the tin for at least 15 minutes before you turn it out.
When the cake has cooled completely, spread the top with Chocolate Hazelnut spread.
PS - Sweet William make a vegan chocolate spread. I'm currently eating the organic version from Aldi.
Wednesday, 20 July 2011
Apple, Fig and Pecan Tea Bread
So it's been quiet here on the blog because I've had a bunch of cooking failures lately - mini muffins that turned out rubbery and burnt on the bottom; raisin, chocolate and oat biscuits that didn't taste that great (and were a bit burnt on the bottom) - FAIL!
See a pattern here? I really don't like my oven. It's about as cheap an oven as you can get. It has an element on the bottom that seems to heat up to about 1000 degrees until the top of the oven reaches the desired temperature. This means that anything in the bottom half of the oven gets burnt to charcoal. Oh what I would give for a fan-forced oven!
But enough whinging for today - there's cooking to do. In my box this week I ordered a kilo of juicing apples. These are apples that are considered "seconds" (but still so tasty!) so I'm cooking them up. Some will become home made puree for baby, some will become dessert, and the rest are going into a sweet loaf to have with tea.
This recipe was inspired by one on the side of a pack of flour - but I've changed it a little bit. It's quite a thick mixture.
300g plain flour
2 tsp baking powder
125g raw sugar
2 tsp cinnamon
1 tsp ginger
100g pecan nut pieces (roughly chopped)
1 grated apple (skin on)
150g dried figs
1 tsp earl grey tea (or 1 tea bag)
2 eggs
60ml light oil
60ml honey
1 tsp vanilla extract
| Tea-soaked figs |
Grease and line a loaf tin and preheat the oven to 180℃.
Mix the dry ingredients in a bowl. In a separate bowl, lightly beat the eggs, and add apple, oil, honey and vanilla. Mix the wet mixture and dry mixture together until just combined. Pour into the tin and bake for 45 minutes or until cooked.
Wednesday, 6 July 2011
Chinese Root Vegetable Cake and Week of the Carrot
Due to some poor ordering over the last two weeks, I have an overabundance of carrots in my fridge. They're delicious sweet little carrots, so I don't want them to go to waste. My challenge this week is to try and cook as many meals as possible that use some carrot, preferably in new and interesting ways!
For no reason this morning the words "turnip cake" popped into my head and I had no idea what they even meant. Some googling reminded me of a tasty Chinese dim sum made from grated and steamed daikon radish. I've been reading a lot of japanese cooking blogs this week, so maybe my subconscious mind came up with the idea while I was asleep last night. Such is the nature of inspiration!
| Grilled Vegetable Cake |
I don't have any daikon, so here's a very unorthodox version using up the root vegetables in the fridge - a turnip from 500m², part of a large parsnip, a pink radish and a couple of small carrots. The pink radish was grated almost to a paste on the microplane, and the rest very finely grated on the box grater. Then some finely diced Chinese sausage, green spring onions and chopped dried shittake mushrooms (rehydrated) were added. The last step was some rice, tapioca and potato flours (you could use plain rice flour, but I had only a little bit so I had to improvise) mixed with water (including the mushroom soaking water) and a pinch of salt and white pepper to bind it all together. Then into the pressure cooker to steam for 20 minutes. Don't ask me for measurements, I don't know, but my guess is that there was 250ml water and about ¾ cup of flours. Initially I was going to cook this in a small rectangular baking dish, but it *just* didn't fit the pressure cooker, so it ended up in a Pyrex bowl - it was thicker than I would have liked, so I just added 5 minutes to the cooking time.
| I lose the challenge because of a dirty plate. This is the finished cake. |
It's very nice if you slice it and grill it in a non-stick frying pan until it's crispy on the outside, then served with a splash of soy or chilli sauce. Oh, and it's vegan if you leave out the sausage!
Friday, 17 June 2011
Guavas!
I got a lovely bag of fresh guavas from my friend at A Sydney Foodie. I've never eaten fresh ones before, only the nectar in a bottle. The first thing that stuck me is the perfume - they smell so absolutely divine! The flavour is all tropical - hints of banana, passionfruit...but they won't keep long so the best thing is to cook them into something delicious.
First up is an asian-inspired dessert, then a simple cake with macadamias and guavas.
Pandan and Coconut Tapioca Pudding with Guava Jelly

Tapioca is one of those love-hate things. I love the bubbly chewy texture of the little pearls in desserts and drinks. You can cook tapioca the same way you would cook a rice pudding with milk, sugar and vanilla, or you can go with more asian flavours like coconut and pandan. I find cooking the pearls separately gives you a better result, with more control over the starchiness. This dessert is also dairy free and gluten free!
1/2 cup sago(seed tapioca), cooked and rinsed
100ml coconut cream
1/4 cup sugar
1 teaspoon tapioca flour
2-3 drops of pandan essence (optional)
Mix the tapioca flour with the coconut, sugar and tapioca pearls in a small saucepan. Cook for 3-5 minutes over a medium heat until the mix thickens. Add the pandan essence and remove from heat, Pour into heat-proof serving glasses and allow to cool.
Pulp from 5 guavas (or use guava nectar)
150ml water
1 tbsp sugar
½ tablespoon of gelatine powder
Blend the guava pulp with 50ml of water, and then strain to remove the seeds. Mix the gelatine and sugar with 100ml boiling water and mix into the guava pulp. Allow to cool slightly then pour over the tapioca layer and chill for at least 2 hours. I made 2 servings.
Guava and Macadamia Cake
Based on this recipe by Steve Manfredi, but with a couple of modifications - green ginger wine is great for cooking (and drinking - it's yummy!) This is a pretty basic cake recipe. You could swap the macadamias for other nuts, and swap the fruit for anything you have that needs cooking up.
6 guavas, peeled
80g macadamia nuts, processed to a rough meal
150g flour
100g sugar
125g softened butter
1 egg
1 tsp vanilla extract
4 tbsp Stone's green ginger wine
Jam for glazing
Chop 2 of the guavas and place them in a blender or food processor. Scoop the seedy flesh out of the other 4 guavas and add to the food processor. Slice the 4 guavas and set them aside.
Add the ginger wine to the guava pulp and blend, then pass through a sieve to remove the seeds.
Beat together the butter, sugar and vanilla essence. Add the egg and beat until combined. Add the guava puree, then beat again. Mix the baking powder with the flour and add this gradually to the cake mix, beating in between. Finally, stir in the ground macadamia.
Pour the mix into a round cake pan and place the guava slices on top. Bake at 180 degrees C for 30 minutes. To glaze the cake, warm a tablespoon of jam in the microwave, then brush over the top of the cake.
First up is an asian-inspired dessert, then a simple cake with macadamias and guavas.
Pandan and Coconut Tapioca Pudding with Guava Jelly
Tapioca is one of those love-hate things. I love the bubbly chewy texture of the little pearls in desserts and drinks. You can cook tapioca the same way you would cook a rice pudding with milk, sugar and vanilla, or you can go with more asian flavours like coconut and pandan. I find cooking the pearls separately gives you a better result, with more control over the starchiness. This dessert is also dairy free and gluten free!
1/2 cup sago(seed tapioca), cooked and rinsed
100ml coconut cream
1/4 cup sugar
1 teaspoon tapioca flour
2-3 drops of pandan essence (optional)
Mix the tapioca flour with the coconut, sugar and tapioca pearls in a small saucepan. Cook for 3-5 minutes over a medium heat until the mix thickens. Add the pandan essence and remove from heat, Pour into heat-proof serving glasses and allow to cool.
Pulp from 5 guavas (or use guava nectar)
150ml water
1 tbsp sugar
½ tablespoon of gelatine powder
Blend the guava pulp with 50ml of water, and then strain to remove the seeds. Mix the gelatine and sugar with 100ml boiling water and mix into the guava pulp. Allow to cool slightly then pour over the tapioca layer and chill for at least 2 hours. I made 2 servings.
Guava and Macadamia Cake
| Not a great picture |
6 guavas, peeled
80g macadamia nuts, processed to a rough meal
150g flour
100g sugar
125g softened butter
1 egg
1 tsp vanilla extract
4 tbsp Stone's green ginger wine
Jam for glazing
Chop 2 of the guavas and place them in a blender or food processor. Scoop the seedy flesh out of the other 4 guavas and add to the food processor. Slice the 4 guavas and set them aside.
Add the ginger wine to the guava pulp and blend, then pass through a sieve to remove the seeds.
Beat together the butter, sugar and vanilla essence. Add the egg and beat until combined. Add the guava puree, then beat again. Mix the baking powder with the flour and add this gradually to the cake mix, beating in between. Finally, stir in the ground macadamia.
Pour the mix into a round cake pan and place the guava slices on top. Bake at 180 degrees C for 30 minutes. To glaze the cake, warm a tablespoon of jam in the microwave, then brush over the top of the cake.
Tuesday, 31 May 2011
Vanilla Rice Milk Custard (Gluten, Dairy and Egg Free)
I've become a fan of organic rice milk. It has a lovely sweet, slightly nutty taste. I love it on my muesli. I've also rediscovered the joys of custard powder and making up a bowl of custard whenever I feel like it.
It occurred to me that using rice milk to make a custard would produce something that has a thick and creamy consistency, with the flavour of rice pudding. It would go very well with some stewed fruit.
2 cups organic rice milk (or soy or oat milk)
3 tablespoons cornflour (or use rice, potato or tapoica flour)
2 tablespoons sugar
½ teaspoon vanilla extract or paste
Mix the cornflour with a little of the rice milk to make a paste. Mix the sugar, paste and vanilla into the rice milk. Heat the mix in a saucepan over a medium heat until it starts to boil and thickens, stirring well. Otherwise microwave on High for a minute at a time, stirring in between until hot and thickened. Note that it keeps thickening as it cools.
Subscribe to:
Posts (Atom)